In this hands-on article we will explain how to configure OSPF dynamic routing protocol on the IP Infusion OcNOS Network Operating System.
To set up OSPF routing between 2 OcNOS routers, you need to follow the below steps:
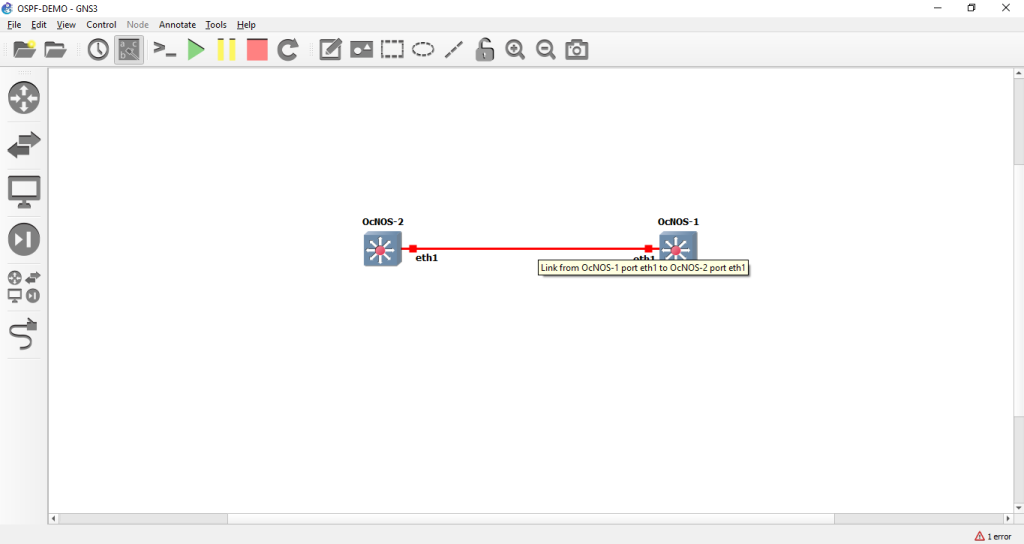
First, drag 2 OcNOS routers onto your topology, configure them as needed (RAM, vCPUs…) and connect them using a link. For the sake of this demo we are going to connect them to their respective eth1 interfaces.
Then, power them on, and wait for them to boot.
Once booted, we can start configuring them.
First of all, we need to assign the eth1 interfaces on each router an IP address.
Note: these addresses need to be on the same subnet, since OSPF operates at the Link Layer (Layer 2).
For the sake of this test, we are going to assign the IP address for eth1 on OcNOS-1: 192.168.1.1
And the IP address for eth1 on OcNOS-2: 192.168.1.2 with subnet mask of /24.
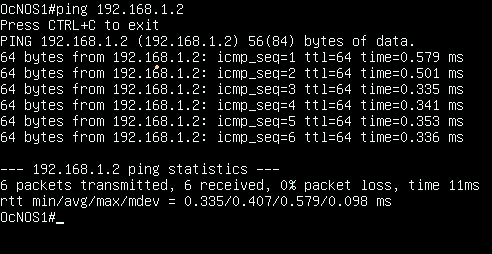
Pinging OcNOS-2 from OcNOS-1 to verify connectivity between the two devices.
Also we need to assign an IP address to the loopback interface on both routers:
Configuration on OcNOS1:
OcNOS1(config)#interface lo
OcNOS1(config-if)#ip address 1.1.1.1/32 secondary
OcNOS1(config-if)#commit
Configuration on OcNOS2:
OcNOS2(config)#interface lo
OcNOS2(config-if)#ip address 2.2.2.2/32 secondary
OcNOS2(config-if)#commit
Next, we need to enable OSPF routing between the routers.
Configuration on OcNOS1:
OcNOS1(config)#router ospf 1
OcNOS1(config-router)#network 192.168.1.0 0.0.0.255 area 0
OcNOS1(config-router)#commit
Configuration on OcNOS2:
OcNOS2(config)#router ospf 1
OcNOS2(config-router)#network 192.168.1.0 0.0.0.255 area 0
OcNOS2(config-router)#commit
Explanation:
router ospf 1: To enable and configure OSPF routing protocol on a router. The number 1 stands for the process ID which is used to identify a specific instance of the OSPF protocol running on the device.
network 192.168.1.0 0.0.0.255 area 0: Configuration command to advertise a network to be included in the OSPF domain and to associate it with a specific OSPF area.
192.168.1.0 represents the IP address of the network being advertised.
0.0.0.255 represents the wildcard mask that specifies the range of IP addresses to be included in the network (it is the inverse of the subnet mask)
area 0 represents the OSPF area to which the network belongs. OSPF uses a hierarchical area structure to organize the network topology, and each network segment in the OSPF domain must belong to a specific area
Commit: Commit the candidate configuration to the running configuration.
To verify that OSPF adjacency is established between the routers, we can use the command:
show ip ospf neighbor
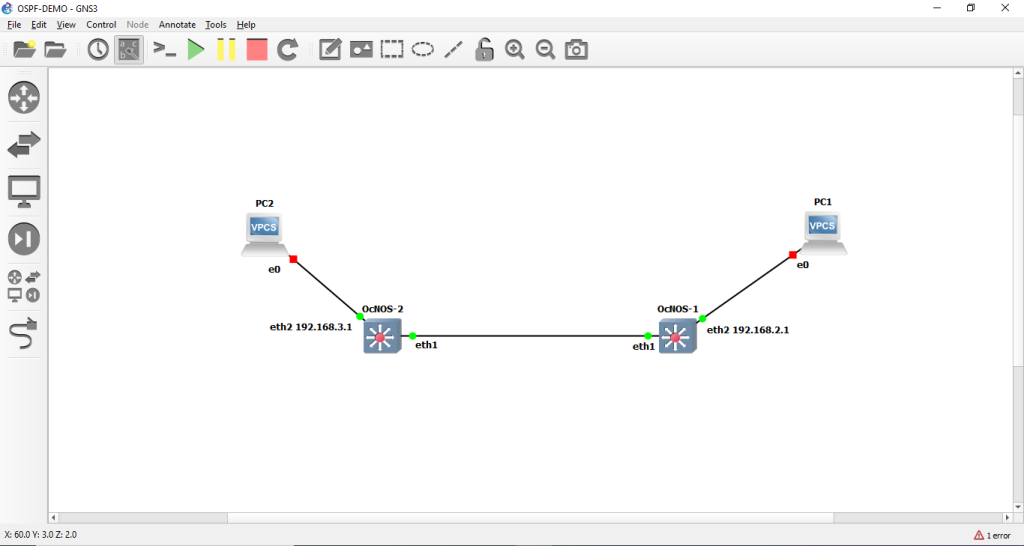
Now we will connect one PC to each router and verify that there is reachability between the PCs.
First, we drag 2 VPCs, one for each router.
Then we connect each VPC to its respective router.
For the sake of this test, we are going to connect the VPC’s Ethernet port to the eth2 interface on its respective router.
Next, we assign an IP address for each eth2 interface on each router. This IP addresses serve as the IP Gateway for the PCs.
For the sake of this test, we are going to assign the IP address 192.168.2.1 to eth2 interface on OcNOS1 and the IP address 192.168.3.1 to eth2 interface on OcNOS2.
Next, we need to assign IP addresses to the VPCs.
We are going to assign PC1 an IP address of 192.168.2.10 by using the following command:
PC1>ip 192.168.2.10/24 192.168.2.1
And an IP address of 192.168.3.10 for PC2:
PC2>ip 192.168.3.10/24 192.168.3.1
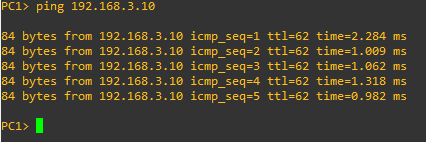
We can now try to ping from PC1 to PC2, we will notice that the ping will fail because OcNOS-1 doesn’t have a route to subnet 192.168.3.0/24 as such it will drop the packets.
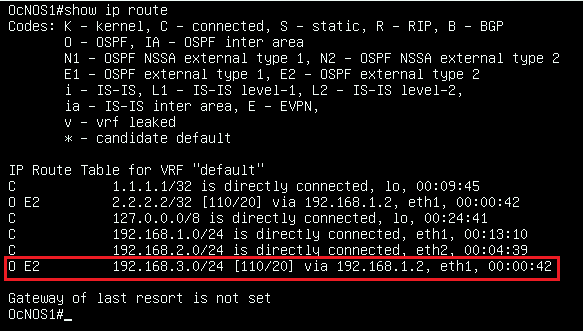
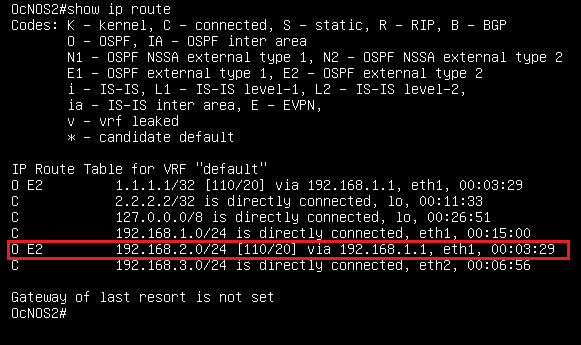
“show ip route” command output on OcNOS-1
Subnet 192.168.3.0/24 is directly connected to OcNOS-2 but not announced in OSPF as such OcNOS-1 doesn’t know about it. There are two ways for OcNOS-2 to advertise the subnet in OSPF to OcNOS-1:
Add a network statement in OSPF
Redistribute directly connected routes in OSPF
In this example we will redistribute connected routes into the OSPF routing domain:
When a router is configured with “redistribute connected” command, it will take all the networks that are directly connected to it and advertise them in OSPF. This means that the router will announce these networks to its OSPF neighbors, and they will be added to the OSPF routing table.
The benefit of using this command is that it allows OSPF to include networks that are not learned through OSPF, such as networks that are locally connected.
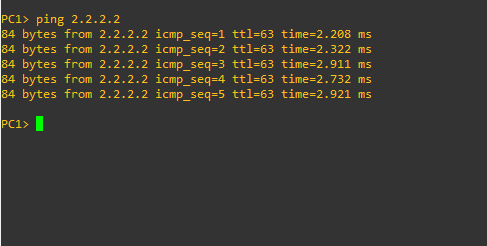
Successful ping from PC1 to Ocnos-2 loopback interface
Here are some common commands that you can use to verify OSPF on a router:
show ip ospf neighbor – Displays information about OSPF neighbors, including their IP address, router ID, and state.
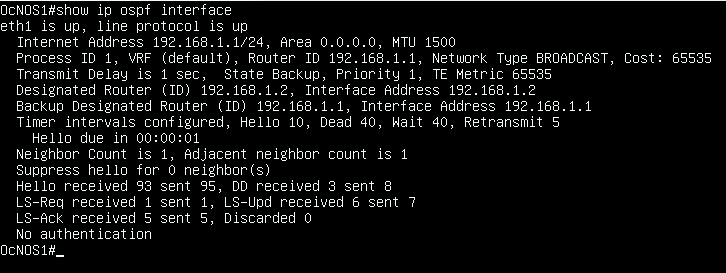
show ip ospf interface – Displays information about OSPF-enabled interfaces, including their IP address, subnet mask, cost, and state.
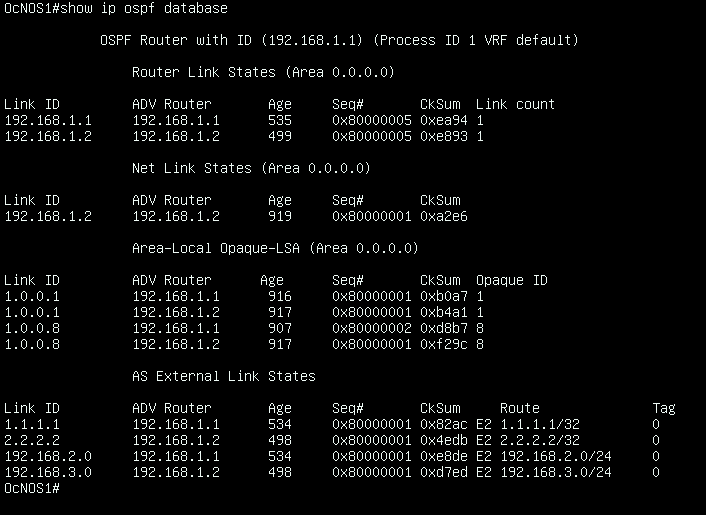
show ip ospf database – Displays the contents of the OSPF database, which contains information about OSPF topology.
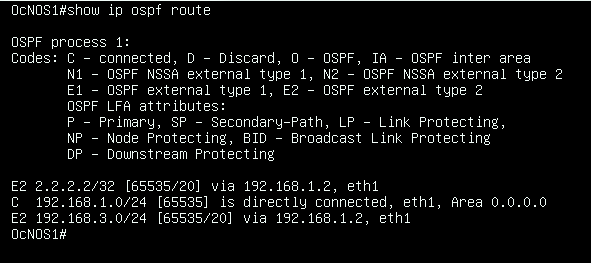
show ip ospf route – Displays the OSPF routing table, which shows the OSPF paths to different destinations.
show ip protocols – Displays the current OSPF configuration on the router, including the router ID, network addresses, and interfaces.
show ip ospf – Displays general OSPF information, including the OSPF process ID, router ID, and timers.
Don’t miss out on our upcoming article where we take a deep dive into the intricacies of OSPF areas, MPLS LDP, and L3VPN, and learn how these technologies can help you build a more efficient and scalable network infrastructure.