Ansible is a powerful automation tool used to streamline network management tasks. Ansible revolutionizes network management, automates routine operations, and enhances scalability. In this article, we will explore getting started with Ansible and automating IP Infusion OcNOS configurations.
What is ansible and why is it a game changer?
Ansible is a multifunctional automation tool, with network automation being one of its prominent applications. It revolutionizes network management by automating repetitive tasks, simplifying complex configurations, and enabling seamless scalability. By leveraging Ansible’s capabilities, network administrators can streamline operations, reduce errors, and achieve greater efficiency in managing their network infrastructure.
What sets this open-source automation tool apart is its agentless architecture, eliminating the need for any software installation on managed devices.
It also uses YAML, which is a user-friendly and easy-to-understand language, allowing users to define tasks and configurations in a straightforward manner.
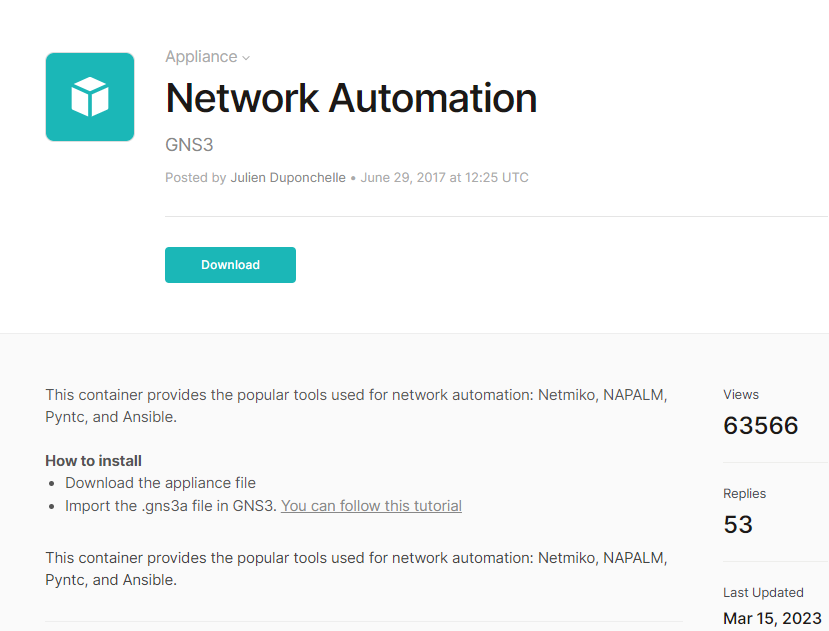
The easiest way to integrate Ansible with GNS3 is to import the pre-existing Network Automation appliance, which is essentially a Linux machine equipped with Ansible pre-installed, available from: https://gns3.com/marketplace/appautomationliances/network-
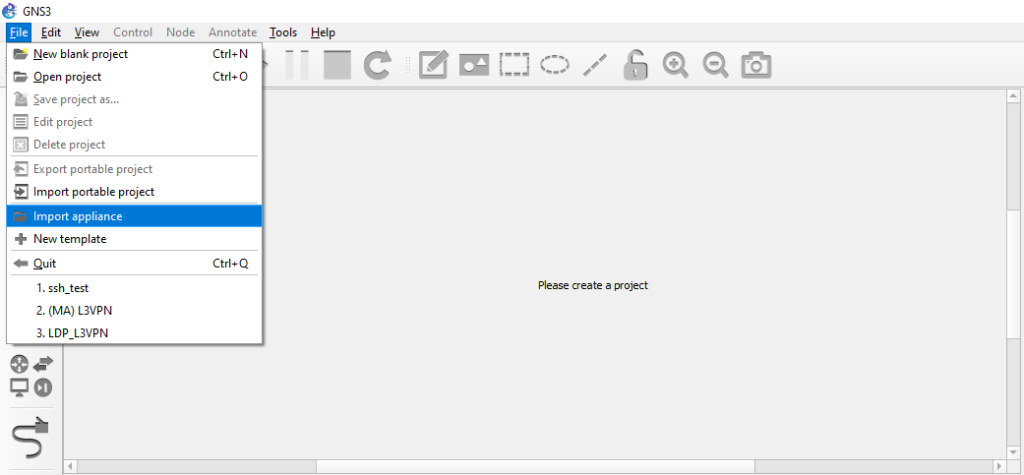
Download the GNS3 appliance file, and then import it by going to File, Import appliance.
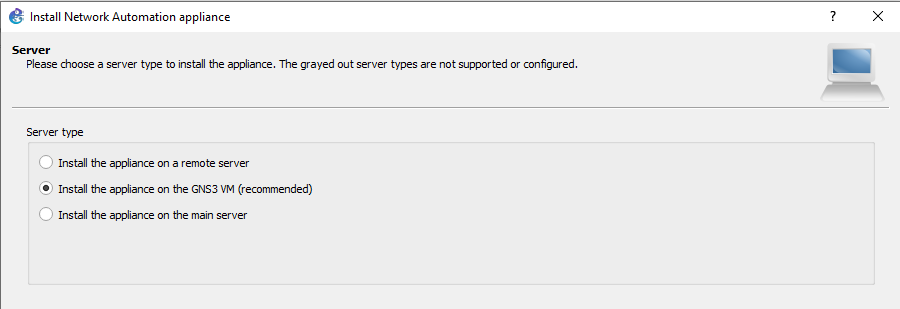
Select where you want to install the appliance, and click finish. That’s it!
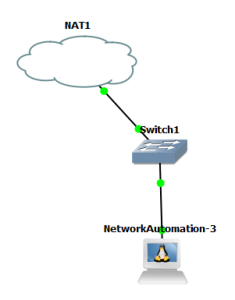
The first step in using Ansible with OcNOS is to install the OcNOS Ansible modules. However, since the installation is performed from the internet, it is necessary to utilize a NAT cloud, which functions as a DHCP server and assigns an IP address capable of being routed onto the internet, facilitating the process.
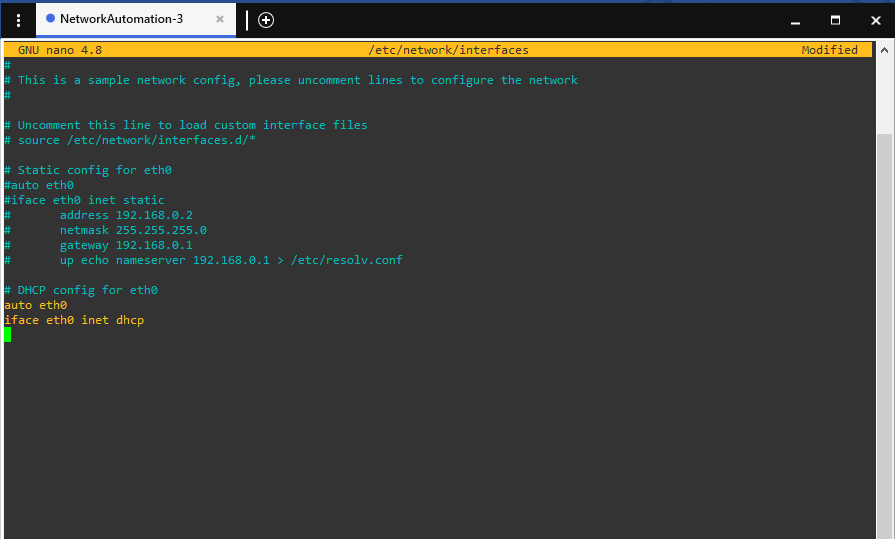
To enable the appliance to obtain an IP address from the DHCP server, it is essential to modify the /etc/network/interfaces file by using the command nano /etc/network/interfaces and uncommenting the DHCP config for eth0
Save your changes by clicking Ctrl x, y, then enter.
Now we have to reboot the machine.
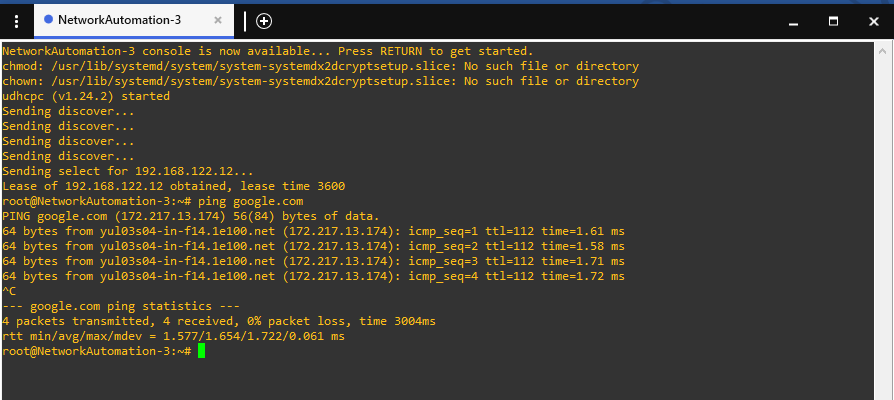
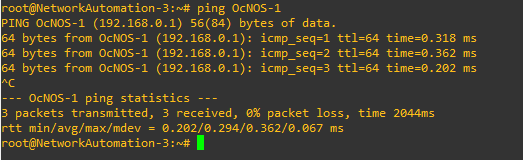
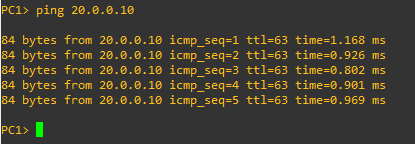
Once the machine is rebooted, we can test internet reachability by pinging google for example.
Now that we can reach the internet, we have to install the OcNOS Ansible module from Ansible Galaxy by using the command:
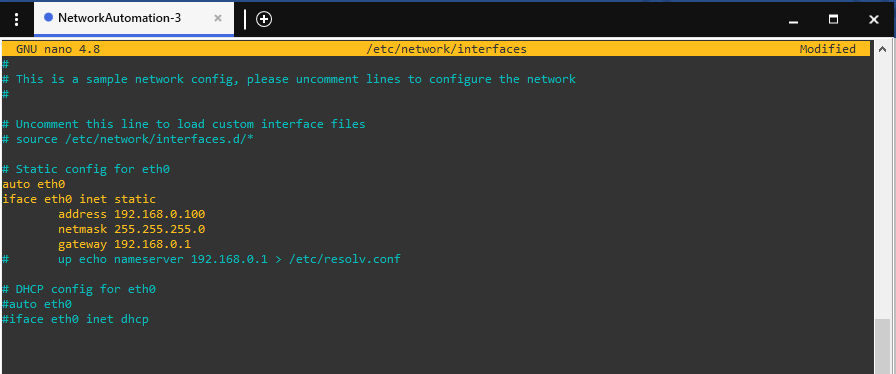
Now that we have installed our module, we no longer need internet access, so we will have to re-edit the /etc/network/interfaces file and assign a static Ip address to our machine, and finally reboot it.
We can also remove the NAT cloud since it is no longer necessary.
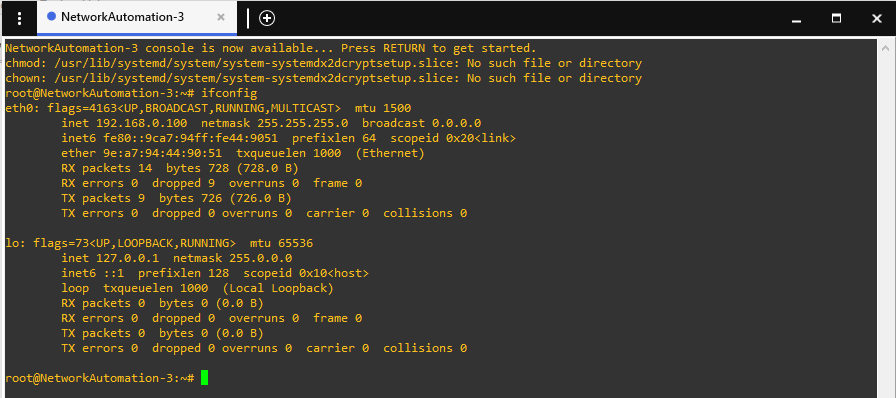
Once the machine is rebooted, we can verify our static config by using the ifconfig command.
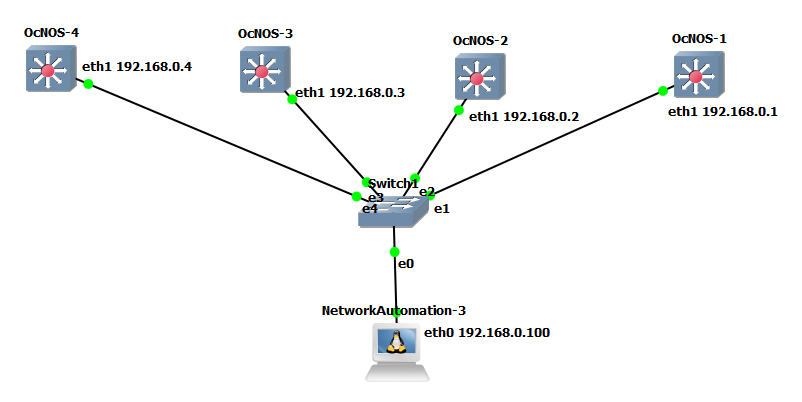
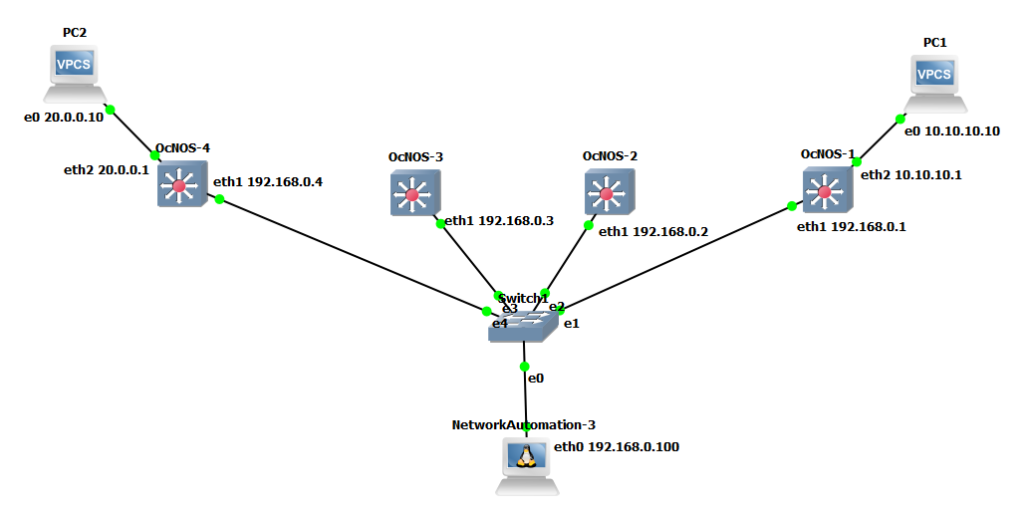
Now let’s add our routers.
As Ansible operates in an agentless manner, it relies on SSH for communication. Therefore, it is necessary to configure SSH on our routers and assign IP addresses to the connected interfaces. Fortunately, the good news is that OcNOS on GNS3 comes with SSH enabled by default.
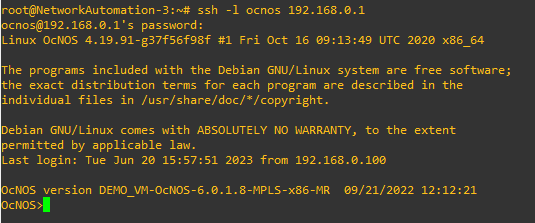
We can configure a username and password for the router, the command username [username] role [role] password [password] must be used. However, for the purpose of this test, we will use the default credentials, which are “ocnos” for both the username and password.
Now let’s try to ssh into the routers.
Now that the setup is complete, let’s jump into creating our files.
First things first, let’s edit our hosts file so that we can reference our routers by names instead of IP addresses.
To do that, use the command nano /etc/hosts and add your routers.
Save your changes.
Now we have to create our inventory file.
The inventory file is necessary for Ansible to keep track of and communicate with the hosts it needs to manage. Ensuring that Ansible can effectively execute tasks and configurations on the intended hosts.
To create an inventory file, the command nano {inventory_file_name} is used.
[routers]: A group called routers, which includes the 4 routers: OcNOS-1, 2, 3 and 4.
[routers:vars]: Variables specific for the routers group.
ansible_user: ssh username
ansible_password: ssh password
ansible_connection: The connection type
ansible_network_os: The network operating system that the routers in the group are running.
With the inventory file in place, it’s time to create playbooks and start automating.
A playbook is a YAML file that automates tasks and configurations for network devices.
Let’s first start by naming our playbook, we will be naming our playbook Interface_configuration.
The command nano Interface_configuration.yml is used.
---
- name: Interface configuration on OcNOS-1
hosts: OcNOS-1
gather_facts: no
tasks:
Note: In YAML files, proper indentation is crucial for defining the structure and hierarchy of data.
Explanation:
name: The name of our play. A play in Ansible is a collection of tasks and configurations applied to hosts, while a task represents an individual action or operation performed on a target host within a play.
hosts: Defining the hosts that the tasks should be performed on.
gather_facts: Determines whether Ansible should collect information or facts about the target host before executing tasks.
Let’s continue with our playbook.
---
- name: Interface configuration on OcNOS-1
hosts: OcNOS-1
gather_facts: no
tasks:
- name: Configuring loopback interface
ipinfusion.ocnos.ocnos_config:
lines:
- ip address 1.1.1.1/32 secondary
parents: interface lo
Explanation:
name: Configuring loopback interface: The name of our task.
ipinfusion.ocnos.ocnos_config: Specific module to manage OcNOS. It allows for tasks such as adding, modifying, or removing configuration lines on the targeted devices.
lines: List of configuration lines to be applied to the device.
parents: Specify the parent section or context in the device’s configuration where the specified lines should be added.
Let’s run our playbook.
Note: Make sure to exit the global configuration mode before running any playbook, otherwise the task will fail.
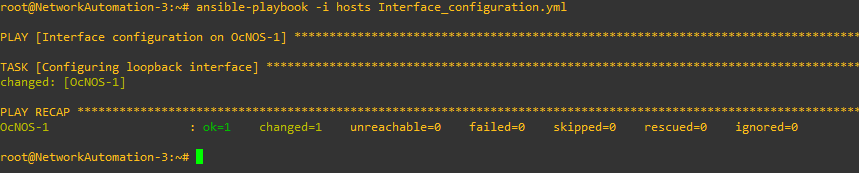
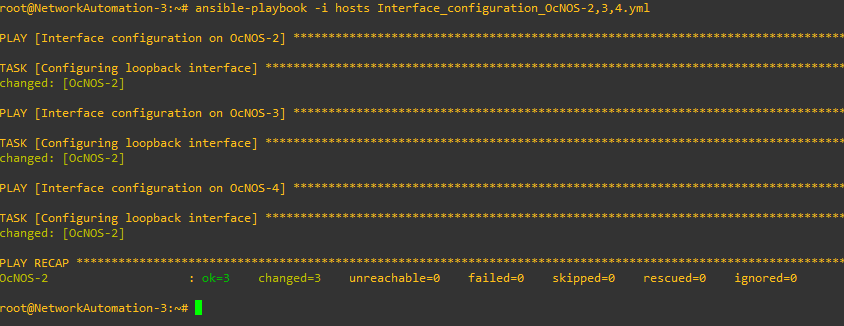
The command ansible-playbook -i hosts Interface_configuration.yml is used.
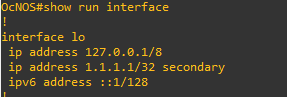
Let’s check our router:
Given the successful configuration of the loopback interface, the subsequent steps can be replicated by copying and pasting the playbook, making necessary adjustments to the values as required.
Let’s now configure the loopback interface addresses of OcNOS-2, 3 and 4.
We’re going to name this playbook Interface_configuration_OcNOS-2,3,4
A recommended best practice is to edit the playbook using a text editor for greater control and visibility of the configuration details.
That’s how our playbook should look like:
---
- name: Interface configuration on OcNOS-2
hosts: OcNOS-2
gather_facts: no
tasks:
- name: Configuring loopback interface
ipinfusion.ocnos.ocnos_config:
lines:
- ip address 2.2.2.2/32 secondary
parents: interface lo
- name: Interface configuration on OcNOS-3
hosts: OcNOS-3
gather_facts: no
tasks:
- name: Configuring loopback interface
ipinfusion.ocnos.ocnos_config:
lines:
- ip address 3.3.3.3/32 secondary
parents: interface lo
- name: Interface configuration on OcNOS-4
hosts: OcNOS-4
gather_facts: no
tasks:
- name: Configuring loopback interface
ipinfusion.ocnos.ocnos_config:
lines:
- ip address 4.4.4.4/32 secondary
parents: interface lo
Now that we are done with the interface configuration, let’s jump into OSPF.
We are going to use the same process, copy and paste the existing playbook in a text editor, edit the names and configuration lines.
This is how our playbook should look like:
---
- name: OSPF configuration on OcNOS-1
hosts: OcNOS-1
gather_facts: no
tasks:
- name: OSPF configuration
ipinfusion.ocnos.ocnos_config:
lines:
- router ospf 1
- router-id 1.1.1.1
- network 1.1.1.1/32 area 0
- network 192.168.0.0/24 area 0
- name: OSPF configuration on OcNOS-2
hosts: OcNOS-2
gather_facts: no
tasks:
- name: OSPF configuration
ipinfusion.ocnos.ocnos_config:
lines:
- router ospf 1
- router-id 2.2.2.2
- network 2.2.2.2/32 area 0
- network 192.168.0.0/24 area 0
- name: OSPF configuration on OcNOS-3
hosts: OcNOS-3
gather_facts: no
tasks:
- name: OSPF configuration
ipinfusion.ocnos.ocnos_config:
lines:
- router ospf 1
- router-id 3.3.3.3
- network 3.3.3.3/32 area 0
- network 192.168.0.0/24 area 0
- name: OSPF configuration on OcNOS-4
hosts: OcNOS-4
gather_facts: no
tasks:
- name: OSPF configuration
ipinfusion.ocnos.ocnos_config:
lines:
- router ospf 1
- router-id 4.4.4.4
- network 4.4.4.4/32 area 0
- network 192.168.0.0/24 area 0
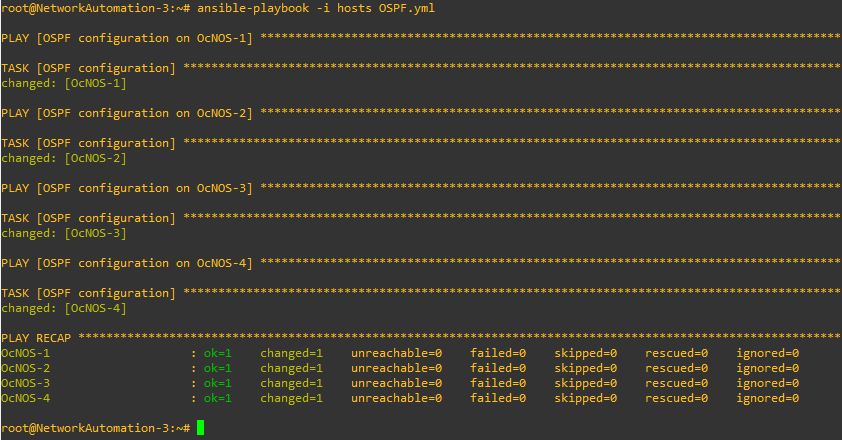
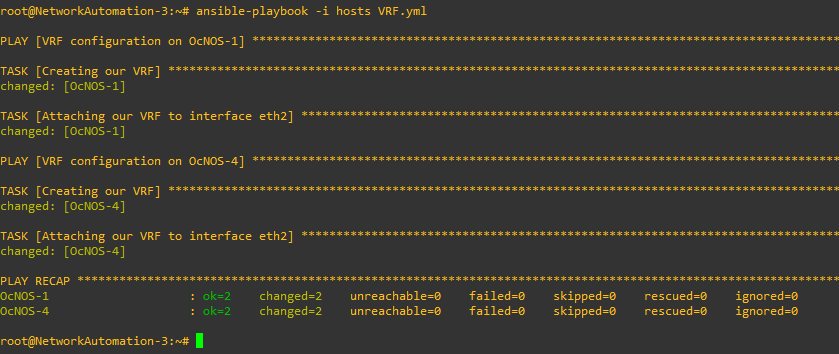
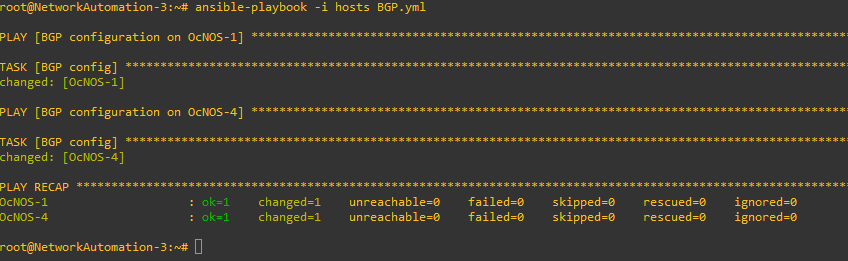
Let’s run it.
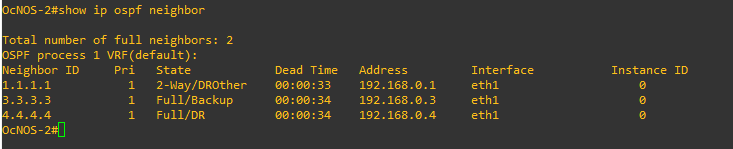
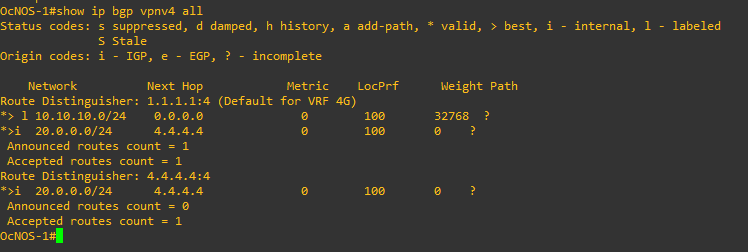
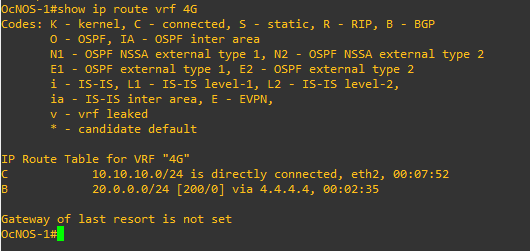
Let’s verify our configuration:
OcNOS-2 neighbors table
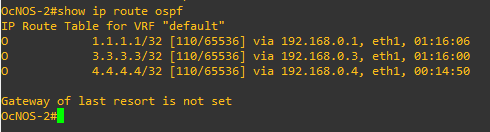
Routes learned through OSPF on OcNOS-2
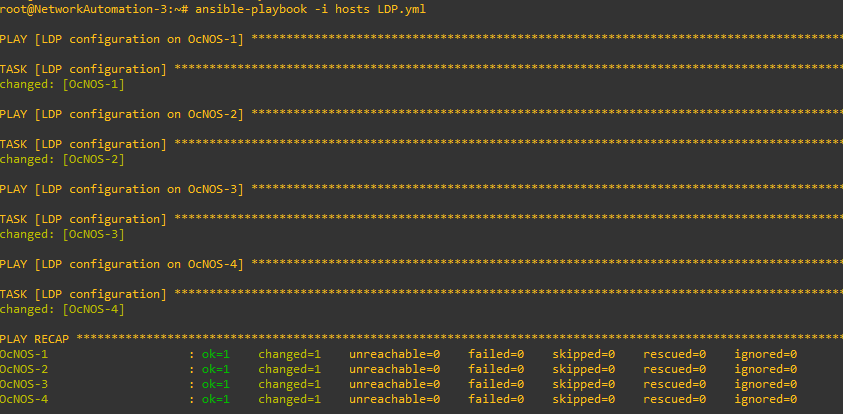
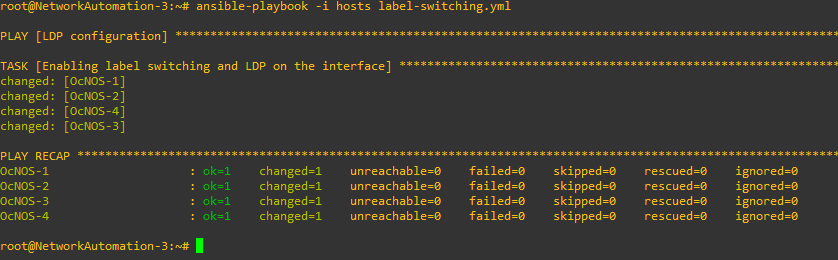
Let’s now jump to LDP configuration.
Let’s edit our playbook, this is how it should look like: